Skip to content

Hardware

Xiaomi Officially Integrates Open Source Home Assistant - A New Smart Home Experience

mi-home-assistant

1. Brief Introduction

Hello everyone! Today we are going to talk about an exciting project for smart home enthusiasts: Xiaomi Official Home Assistant Integration (ha_xiaomi_home). This project is developed and maintained by Xiaomi, aiming to provide Home Assistant users with a smoother and more reliable control experience for Xiaomi IoT devices.

In the past, while there were some third-party integrations for Xiaomi devices on the market, they had various issues, such as delayed device status responses. Now, with official support, we can expect better performance and stronger security.

Home Assistant is an open-source home automation platform known for its powerful compatibility and flexibility, loved by DIY enthusiasts. Now, with Xiaomi, a giant in the smart home field, joining the Home Assistant ecosystem, it is undoubtedly something to look forward to.

Main Features:

  • Official Support: Developed and maintained by Xiaomi, providing better stability and compatibility.
  • Home Assistant Integration: Allows users to control and manage Xiaomi smart devices within Home Assistant.
  • Enhanced User Experience: Aims to provide faster device status responses, addressing delays present in third-party integrations.
  • Wide Device Support: Supports most Xiaomi IoT devices, except for Bluetooth, infrared, and virtual devices.
  • Multi-account and Regional Support: Supports multiple Xiaomi accounts and allows devices from different regions to be added to the same Home Assistant area.

2. Core Features

  • Multiple Installation Methods: Supports various installation methods, including Git clone, HACS, and manual installation. The official recommendation is to use Git clone for easier version management and updates.
    • Git clone installation: cd config; git clone https://github.com/XiaoMi/ha_xiaomi_home.git; cd ha_xiaomi_home; ./install.sh /config.
  • OAuth 2.0 Login: Adopts OAuth 2.0 login method, not storing user passwords directly in Home Assistant, enhancing security.
  • Cloud Control and Local Control: Primarily controlled through Xiaomi Cloud. For devices that support local control, communication can occur through Xiaomi gateways or local area networks.
    • Cloud Control: Communication and control through Xiaomi cloud servers.
    • Local Control: Direct communication within the local network via Xiaomi central gateway or LAN, but local control is not available in all regions.
      • Central Gateway: Available only in mainland China.
      • LAN Control: Available in all regions but limited to IP devices and is experimental, not recommended for use.
  • Device Message Subscription Mechanism: Uses a message subscription mechanism to push messages to Home Assistant in real-time when device properties change or events occur, reducing polling pressure on the cloud.
  • MIoT-Spec-V2 Mapping: Uses the Xiaomi IoT protocol MIoT-Spec-V2 to map devices, services, properties, events, and actions to entities in Home Assistant, ensuring device functionality.

3. Usage Tips

  • Multi-account Management: After logging in and configuring one Xiaomi account, you can add other Xiaomi accounts by clicking "Add HUB".
  • Region Selection: When importing Xiaomi devices, be sure to select the correct region, as data from different regions is isolated.
  • Debug Mode: Enabling debug mode for actions allows you to manually send action commands with parameters.
  • Entity Conversion Rule Updates: If you modify the specv2entity.py, spec_filter.json, or multi_lang.json files, you need to update the entity conversion rules in the integration configuration page for changes to take effect.
  • Custom Filtering: Use the spec_filter.json file to filter out MIoT-Spec-V2 instances that do not need to be converted to Home Assistant.
  • Localization: The multi_lang.json file is used to provide localized translations of device names and other text elements, taking precedence over cloud translations.

4. Application Cases

  • Smart Lighting Control: Control the brightness, color, and switch status of Xiaomi smart bulbs through Home Assistant.
  • Smart Security: Combine Xiaomi smart cameras and sensors to achieve home security automation, such as sending alerts when abnormal movement is detected.
  • Environmental Monitoring: Use Xiaomi temperature and humidity sensors to monitor indoor environments in real-time and automatically adjust air conditioning or heating based on temperature.
  • Automated Scenarios: Utilize Home Assistant's automation features to set various scenarios, such as "Home Mode," "Away Mode," etc., to achieve smart home automation control.

5. Security Concerns

Although the Xiaomi official integration uses OAuth 2.0 login methods to enhance security, there are still some security risks:

  • Plaintext Storage of User Data: Sensitive information such as device information, certificates, and tokens are stored in plaintext in Home Assistant's configuration files. This means that if the configuration file is leaked, others may access your Xiaomi devices.
  • Protecting Configuration Files: You need to ensure that your Home Assistant configuration files are well protected to prevent leaks.
  • Revoking Authorization: If you suspect that the OAuth token has been leaked, you can revoke login authorization through the Xiaomi Home App.

Therefore, it is essential to properly safeguard your Home Assistant configuration files to prevent leaks!

6. Frequently Asked Questions

  • Which devices are not supported?
    • Currently, Bluetooth devices, infrared devices, and virtual devices are not supported.
  • How to add multiple Xiaomi accounts?
    • In the configured Xiaomi Home integration page, click "Add HUB" to add other Xiaomi accounts.
  • Is local control available in all regions?
    • Local control through the central gateway is only available in mainland China, while LAN control is available in all regions but limited to IP devices and is not recommended for use.
  • Why does the official recommend Git clone installation?
    • Git clone is convenient for version switching and updates, making management easier.
  • How to update the integration?
    • You can switch to a specified version through Git clone or use HACS for updates.
  • How to use custom configurations?
    • You can edit the spec_filter.json and multi_lang.json files for filtering and translation, and update entity conversion rules.

My TV - A Free and Customizable Open Source IPTV Solution

mytv

Are you tired of expensive cable TV subscriptions and limited channel choices? Many people feel frustrated with the high costs, contracts, and lack of flexibility of traditional TV services. But what if there was a way to watch live TV without these restrictions? This is where "My TV" comes into play, a free open-source alternative that allows you to control your viewing experience. This blog post will explain what "My TV" is and how it provides a customizable IPTV experience.

What is "My TV"?

"My TV" is a free open-source IPTV software designed specifically for Android devices (especially smart TVs and TV boxes). It allows users to watch live TV channels by importing custom video sources, giving you the flexibility to choose what and how you watch. There are actually two versions: the original "my-tv" and a newer version called "my-tv-0". The "my-tv-0" version has enhanced features, such as remote configuration via QR codes, making it more user-friendly.

Features and Characteristics

The core advantage of "My TV" lies in its customizability. Here are some key features:

  • Customizable Video Sources: Users can configure their own video sources, providing flexibility and avoiding reliance on specific providers. This means you won't be locked into specific channels or providers.
  • Supported Formats: The application supports various video source formats, including:
    • .txt: A simple text format where each line defines a channel, with group name, #genre#, title, and video URL separated by commas.
    • .m3u: A more complex format typically used for IPTV playlists, which includes channel names, logos, and group titles using #EXTM3U and #EXTINF directives.
    • .json: A structured data format that allows defining properties such as "group," "logo," "name," "title," "uris" (video addresses), and headers.
  • Specific Features of "my-tv-0":
    • Remote Configuration: This version has a significant feature that allows easy setup via QR codes or HTTP addresses. You can scan a QR code with your phone to input your custom video source URL. This is a major upgrade from previous versions, as it eliminates the need to manually enter long and complex URLs using the TV remote. The text states: "After opening the configuration, select remote configuration, scan the QR code to configure the video source, etc. You can also directly configure the remote address http://0.0.0.0:34567."
    • Automatic Updates: If this option is configured, the application can automatically update video sources upon startup. "If the video source address is configured and 'Update video source after application startup' is enabled, the application will automatically update the video source after startup."
  • Basic Playback Control: Both versions allow users to navigate video lists, change channels, and manage favorites using a remote control or touchscreen. "Press the left button on the remote/touchscreen to open the video list."

Installation Guide

You can install "My TV" on Android TV devices using the following methods:

  • USB Installation: Download the APK file from the GitHub release page and install it using the file manager on your Android TV.
  • Xiaomi TV Assistant: Xiaomi TVs can use their TV assistant application for installation.
  • ADB (Android Debug Bridge): After enabling ADB on your device, use the command adb install my-tv.apk.

Please remember to enable "Install from unknown sources" in your Android settings to allow sideloading applications.

User Experience

"My TV" is generally considered easy to use, with the "my-tv-0" version being particularly convenient due to its QR code configuration. The original version of "my-tv" "directly opens CCTV live broadcasts." Many users find the software stable and reliable; one YouTube user called it "the best version." However, it is important to acknowledge that some devices may experience crashes or instability. Additionally, the availability and reliability of channels depend on the video sources you use. If you encounter issues, try restarting the application, restoring settings, or reinstalling it. The user interface primarily uses Chinese.

Ethical Considerations and Licensing

"My TV" is open-source software, meaning its source code is open to everyone. This allows for transparency, community involvement, and free access to media. However, it is important to note that "my-tv" is explicitly licensed for "learning and research" purposes only and should not be used for commercial purposes. The developers warn that it "may be terminated at any time" and encourage users to "use it cautiously and recommend watching through official channels." The software should be deleted within 24 hours after downloading. The reliability of streams depends on the stability of the video sources.

Finding Video Sources

The "My TV" application does not come with built-in video sources. You need to find these URLs elsewhere, usually from online forums, repositories, or other online spaces. These sources are third-party sources, and their reliability can vary greatly.

Future Development

Both "my-tv" and "my-tv-0" are actively being developed, with frequent releases on GitHub. You can check their respective GitHub pages (linked above) for the latest updates and "TODO" items. Some planned features include: * "my-tv-0": Support for playback history, detailed Electronic Program Guide (EPG), light menu themes, handling invalid channels, improved channel list management, default display of channel menus, and remote configuration using WebView. * "my-tv": Addressing volume inconsistency issues, adding specific channels, adding soft decoding, and implementing automatic updates.

Conclusion

"My TV" and its successor "My TV 0" offer a free and highly customizable way to watch live TV on Android-based devices. The advantages of these projects lie in their flexibility and user control, allowing the use of various video sources. The improvements in "my-tv-0," especially remote configuration via QR codes, address previous limitations, making the process more user-friendly. If you are looking for a free and customizable IPTV solution, give "My TV" a try and explore its features! If you are interested, consider contributing to the open-source project!

Opensource Router Operating System OpenWrt Explained

OpenWrt

OpenWrt is a Linux-based operating system primarily used for embedded devices such as routers. Unlike traditional router firmware, it provides a fully writable file system with package management. This allows users to customize their router's functionality by installing specific application packages, freeing them from vendor limitations. OpenWrt also typically supports devices longer than the original firmware and offers a large, helpful community.

Here are some key aspects of OpenWrt:

Installation and Basic Configuration

  • Hardware Requirements: When selecting a new router for OpenWrt, it is recommended to look for devices with "more than 8MB of flash and more than 64MB of RAM" to ensure full functionality of the operating system and GUI.
  • Firmware Selection: It is crucial to choose the correct firmware file for the specific model and hardware version of the router (e.g., "WR841N" hardware version "8"), as using the wrong file may "brick" the device. The correct firmware file will end with "factory.bin".
  • Flashing Process: Flashing is done through the router's web interface, and users should connect using an Ethernet cable and navigate to the "System Tools" -> "Firmware Upgrade" page.
  • Initial Access: After installation, access OpenWrt through the router's IP address (usually 192.168.1.1) via the LuCI web interface.
  • Security Hardening: The first step after installation should be to set the root password for enhanced security and configure the device as a Wi-Fi access point.
  • Wireless Settings: By default, wireless is turned off, and it must be manually enabled in the LuCI interface for the wireless access point functionality to work properly.
  • Basic Network Configuration: OpenWrt allows configuration of DHCP leases, network interfaces, and port forwarding settings.
  • Changing LAN IP Address: This tutorial demonstrates how to change the router's default LAN IP address (e.g., changing to 192.168.9.1). However, DHCP settings must be manually edited to prevent conflicts.

Advanced Configuration and Features

  • Wireless Client Mode (AP Client): OpenWrt can be configured as a wireless client to connect to an existing network and then redistribute that connection to devices on the LAN, which is useful for extending existing network coverage.
  • System Logs: OpenWrt stores comprehensive logs that provide real-time information about network operations, such as which devices have received IP addresses and general activity. These logs provide a good overview of the current network configuration.
  • LuCI Application: This tutorial introduces the installation of luci-app-statistics, which provides a good view of "router historical data charts," such as CPU, RAM, ping times, and system uptime.
  • Configuration Files: OpenWrt's configuration files use a section and option/value structure and are located in /etc/config/.
    • The general syntax is config [""] for sections, option "" for options. These files are parsed by the shell.
  • Network Configuration: Network interface configurations are stored in /etc/config/network. These can be set to "none," "static," "dhcp," or "pppoe" protocols. When using the static method, the ipaddr and netmask options are mandatory.
  • Switch Configuration: OpenWrt supports switch configuration for setting up VLANs.
    • Switch configurations are stored in /etc/config/network.
    • On Broadcom hardware, the section name needs to be eth0.
    • Each VLAN needs to have a name vlan, where n is the VLAN number. These values can include: * (for setting the default VLAN), u (untagged), and t (tagged). The CPU port on Broadcom hardware is port 5.
  • Wireless Configuration: WiFi settings are configured in /etc/config/wireless, and each wireless driver has a configuration file in /lib/wifi/.sh.
    • Some options you can set for wifi devices include: distance, mode, diversity, rxantenna, txantenna, txpower.
    • Options for wifi interfaces include: network, device, mode, ssid, and bssid.
    • Supported modes include: access point, client, ad-hoc, monitor, and WDS point-to-point.
  • 802.1x Authentication: OpenWrt supports 802.1x authentication (client and access point configuration), with EAP types being TLS, TTLS, or PEAP.

Development and Customization

  • Build System: The OpenWrt build system allows developers to create custom firmware images using a cross-compilation process.
  • Source Code: OpenWrt is available through a Subversion repository. Major directories include tools, toolchain, package, and target.
  • Building Images: The command make menuconfig is used to configure the build process, including selecting platforms, toolchains, and required packages.
  • Packages: Almost everything in OpenWrt firmware is a package (.ipk). These packages can be added to the firmware to provide new features or removed to save space.
  • Build Environment: OpenWrt provides a method to build images for multiple configurations using the command ./scripts/env.
  • Creating Packages: To create a package, create a makefile that will automatically show up in the menu the next time make menuconfig is run.
    • Some options you can configure include: PKG_NAME, PKG_VERSION, PKG_RELEASE, PKG_SOURCE, PKG_SOURCE_URL, PKG_MD5SUM, PKG_CAT, PKG_BUILD_DIR.
    • You can also add information such as DEPENDS, BUILDONLY Package//conffiles.
    • You will also need to define Build/Compile, Build/Install, and Package//install options.
  • Creating Kernel Module Packages: You can create packages for modules provided with the mainline kernel as well as external kernel modules by defining a KernelPackage section.
    • Configurable options include TITLE, DESCRIPTION, SUBMENU, KCONFIG, FILES, and AUTOLOAD.
  • Troubleshooting: The command TOPDIR=$PWD make -C package/ DUMP=1 V=99 can help diagnose whether a package is correctly displayed in menuconfig. You can also use commands like make package//clean V=99 or make package//install V=99 to clean or install specific packages.
  • Adding Platform Support: Many devices run Linux operating systems, even if the firmware is not open to consumers. OpenWrt can be ported to these devices by discovering whether they already run Linux and looking for developer toolkits.
    • Useful techniques for this include: operating system fingerprinting, port scanning, analyzing binary firmware images, checking flash amounts, and inserting serial ports.
    • Once a developer toolkit is found, kernel patches and binary drivers can be adjusted for OpenWrt, and new flash mapping drivers and firmware build tools can be developed.
  • Reporting Bugs: OpenWrt uses a Trac system for bug reporting.
    • Reporters can open tickets for bugs, new packages, or feature requests.
    • Developers can close, accept, and fix tickets.

Other Information

  • SSH: Command-line access to OpenWrt is typically done using SSH.
  • Text Editors: vi and vim can be used to edit text files in the command line. Common shortcuts can be found in the FAQ.
  • Windows Management Tools: Tools like cmder, SmarTTY, PuTTY, and WinSCP can be used to manage OpenWrt from Windows.
  • WAN and WAN6 Interfaces: WAN and WAN6 interfaces are used for upstream IPv4 and IPv6 connections, respectively. The LAN interface handles downstream IPv4 and IPv6, eliminating the need for a separate LAN6 interface.
  • Hotplug: OpenWrt can be dynamically configured based on events using hotplug, which is configured using scripts.
  • Init Scripts: All init scripts need to be installed as /etc/init.d/name and wrapped using /etc/rc.common. These scripts are used to start system services.
  • Network Scripts: Network scripts can be accessed by including /lib/network. These scripts help manage interfaces and have functions like find_config and setup_interface.

Unveiling the X79 Motherboard - Why Are Prices So Varied? In-Depth Comparison of Brands like ASUS and EVGA!

x79

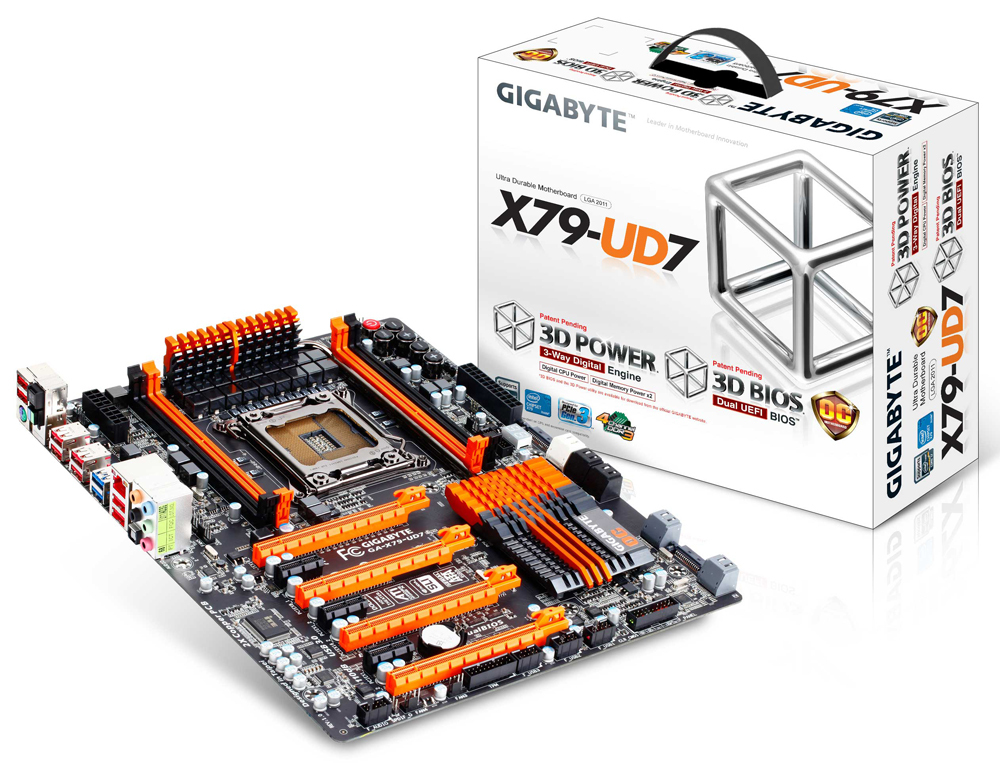
Hello everyone! Today, we are going to discuss a topic that confuses many computer enthusiasts: the X79 motherboard. This once high-end platform is still active in the second-hand market, but prices vary widely. Ranging from a few hundred to several thousand yuan, what causes such a significant difference? Today, we will delve into this and compare several classic models to clear up your confusion!

X79 Motherboard: It's More Than Just Size Differences

Many friends may wonder, don't X79 motherboards all look similar? Is the price difference merely due to size? Of course not! As a Chinese video blogger said, "You get what you pay for." The quality and performance differences in X79 motherboards mainly manifest in the following aspects:

  • Authenticity of the Chipset:

    • Some cheap X79 motherboards may not actually use a genuine X79 chipset. They might be modified from lower-end chipsets like H61 or H81, disguised as X79. This practice can lead to significant drops in compatibility and stability.
    • In contrast, high-end X79 motherboards will use the native X79 chipset, ensuring performance and compatibility.
  • Power Supply Design:

    • Low-end X79 motherboards may falsely advertise the number of power phases. They may appear to have a 7-phase power supply, but in reality, they might just have a few inductors added without true power capabilities.
    • High-end X79 motherboards will employ genuine, high-quality power supply designs to ensure stable CPU operation, especially during overclocking.
  • Expansion Interfaces:

    • Cheap X79 motherboards may have very few expansion interfaces, such as only one M.2 interface or even lacking SATA 3.0 interfaces.
    • High-end X79 motherboards will provide a wealth of expansion interfaces, including multiple M.2 interfaces (supporting dual protocols) and several SATA 3.0 interfaces to meet users' needs for high-speed storage.

Classic Model Comparison: ASUS vs. EVGA

In the realm of X79 motherboards, ASUS and EVGA are two brands that cannot be overlooked. Let's compare their flagship models:

  1. ASUS Sabertooth X79:

    • Features: Known for its cooling design. It is equipped with fans on both the VRM and southbridge heatsinks, and there are heat pipes connecting the VRM heatsinks. This is crucial for the LGA2011 platform, as it tends to generate heat under high loads.
    • Interfaces: Equipped with 7 fan headers, 8 SATA ports (4 of which are 6Gbps), 6 USB 3.0 ports, and 2 eSATA 6Gbps ports.
    • Positioning: Although it has overclocking capabilities, it is more geared towards workstation users. It lacks some buttons and switches that extreme overclocking enthusiasts might need, such as power and reset buttons on the motherboard.
    • Pros: Strong cooling, comprehensive features, high stability.
    • Cons: Lacks some extreme overclocking features.
  2. EVGA X79 Dark:

    • Features: Uniquely designed for multi-GPU setups and extreme overclocking enthusiasts. It has 8 memory slots, 2 Intel NICs, and 10 SATA ports (6 of which are 6Gbps).
    • Interfaces: Features a unique PCIe layout that can support 3 triple-slot graphics cards or 5 single-slot graphics cards.
    • Design: Uses E-ATX specifications, with a 90-degree angled 24-pin power connector, suitable for large cases.
    • Positioning: Aimed at high-end gaming and extreme overclocking users.
    • Pros: Unique multi-GPU layout, strong overclocking potential.
    • Cons: Frequent BIOS issues, with initial releases even failing to correctly implement Intel Turbo Boost, and XMP functionality also had defects, leading to overclocking failures.

The Importance of BIOS: An Overlooked Detail

The example of the EVGA X79 Dark shows that the BIOS is crucial for motherboard performance. An unstable BIOS can lead to various issues, including the CPU not being able to boost properly, memory not operating at the correct frequency, or even failing to overclock. Therefore, when choosing a motherboard, it is essential to pay attention to the stability and maturity of its BIOS.

Conclusion and Recommendations

In summary, choosing an X79 motherboard is not just about looking at specifications; it requires a comprehensive consideration of your needs and budget.

  • If you prioritize stability and reliability and mainly use it for workstation applications, the ASUS Sabertooth X79 would be a good choice.
  • If you are an extreme overclocking enthusiast and are not afraid of tinkering, you might consider the EVGA X79 Dark, but be prepared to deal with potential BIOS issues.
  • Most importantly, do not be tempted to buy cheap, unverified second-hand X79 motherboards. Always choose legitimate channels and carefully verify the authenticity of the motherboard to avoid counterfeit products.