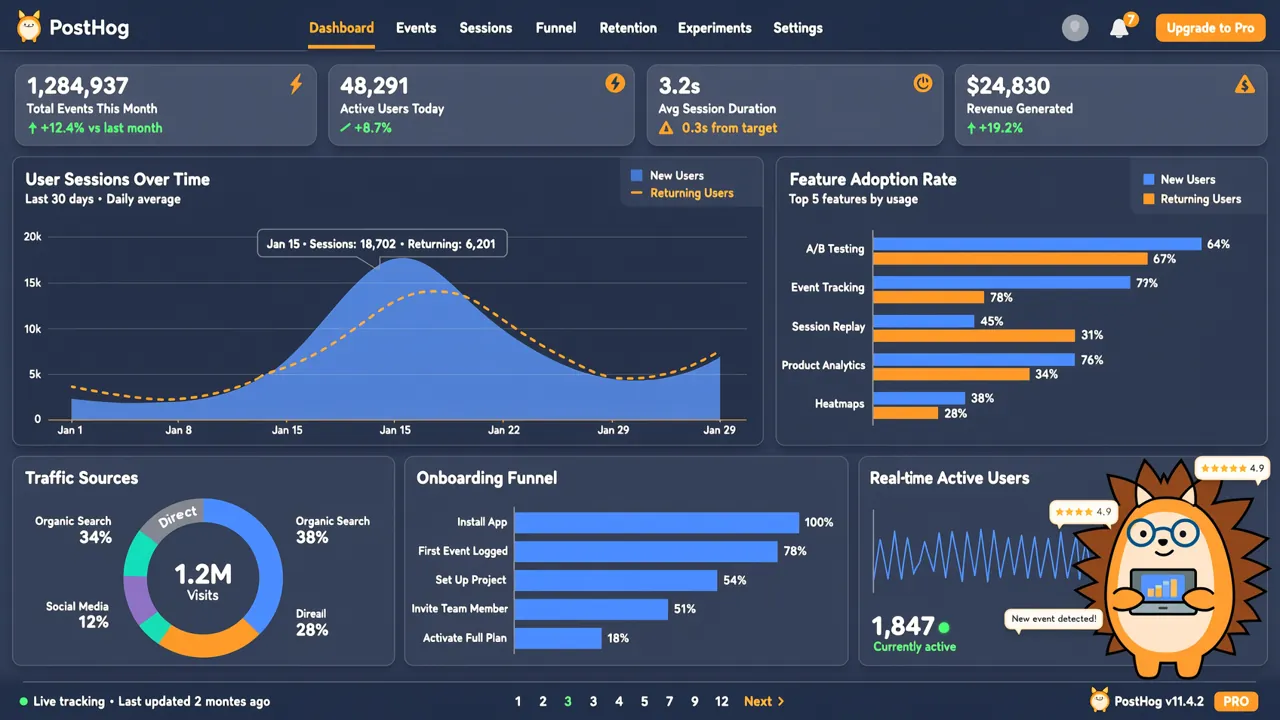
PostHog란?
PostHog는 현재 GitHub에서 가장 핫한오픈소스 프로덕트 분석 & AI 옵저버빌리티 플랫폼(⭐ 19,000개 이상 Star)입니다. Google Analytics 같은 클로즈드 소스 도구와 달리, PostHog는 프로덕트 분석, 사용자 행동 추적, A/B 실험, 기능 플래그, 오류 추적을 하나의 통일된 오픈소스 플랫폼으로 통합하며, 데이터를 완전히 자율적으로 관리할 수 있습니다.
개발자들이 PostHog를 선택하는 이유?
| 비교 항목 | Google Analytics | Mixpanel | PostHog |
|---|---|---|---|
| 오픈소스/자체 호스팅 | ❌ | ❌ | ✅ MIT License |
| 데이터 소유권 | Google 소유 | Mixpanel 소유 | 본인 소유 |
| 세션 리플레이 | ❌ | ✅ 유료 | ✅ 내장 |
| 기능 플래그 | ❌ | ❌ | ✅ 내장 |
| A/B 실험 | ❌ | ✅ 유료 | ✅ 내장 |
| AI 옵저버빌리티 | ❌ | ❌ | ✅ LLM 호출 추적 |
| 무료 한도 | 무제한(단 샘플링 있음) | 월 100만 이벤트 | 월 100만 이벤트 |
| 가격 정책 | 엔터프라이즈 비쌈 | 사용량 기반 | 초과분 사용량 기반 |
PostHog의 핵심 포지셔닝은제품 팀과 개발자가 사용자 행동을 이해하고, 데이터 기반 제품 결정을 내리도록 돕는 것입니다. 독특한 장점은 다음과 같습니다:
- All-in-One 플랫폼: 프로덕트 분석, 웹 분석, 세션 리플레이, 기능 플래그, 실험, 오류 추적, 로그, 설문조사를 하나의 도구로 커버
- AI 옵저버빌리티: LLM 호출의 지연 시간, 비용, 생성 콘텐츠를 추적 — 2026년 차별화 기능
- MCP 통합: MCP 프로토콜을 통해 Claude Code, Cursor 등 AI 코딩 도구에 연결하여 에디터에서 직접 데이터 조회
- Self-driving 모드: 레이지 클릭, 오류, 실패 쿼리를 자동 감지하여 분석 보고서와 PR 생성
PostHog vs 다른 솔루션의 아키텍처 차이
┌─────────────────────────────────────────────────┐
│                   PostHog                        │
├──────────┬──────────┬──────────┬────────────────┤
│ 프로덕트 │ 세션     │ 기능     │ AI             │
│ 분석     │ 리플레이 │ 플래그   │ 옵저버빌리티   │
│ (Events) │ (Replay) │ (Flags)  │ (LLM Traces)   │
├──────────┴──────────┴──────────┴────────────────┤
│          통합 ClickHouse 데이터 엔진              │
├─────────────────────────────────────────────────┐
│     프론트엔드 SDK | 백엔드 SDK | API | MCP      │
└─────────────────────────────────────────────────┘
PostHog 자체 배포
옵션 1: PostHog Cloud (추천)
가장 빠른 방법, 운영 작업 불필요:
- PostHog Cloud US — 해외 사용자
- PostHog Cloud EU — 데이터 규정이 필요한 유럽 사용자
무료 한도 월간 포함: 100만 이벤트, 5,000회 녹화, 100만 Flag 요청, 10만 예외.
옵션 2: Docker 원클릭 배포 (자체 호스팅)
데이터를 완전히 관리하고 싶다면, PostHog는 심플한 Hobby 배포 방안을 제공합니다.
사전 조건: - Linux 서버 - 최소 4GB 메모리 - Docker + Docker Compose
명령어 하나로 배포:
/bin/bash -c "$(curl -fsSL https://raw.githubusercontent.com/posthog/posthog/HEAD/bin/deploy-hobby)"
배포 완료 후 http://localhost:8000에 접속하면 PostHog 관리 화면을 볼 수 있습니다.
옵션 3: Docker Compose 수동 배포
더 세밀한 제어가 필요하다면:
# docker-compose.yml
version: '3.8'

services:
  posthog:
    image: posthog/posthog:latest
    ports:
      - "8000:8000"
    environment:
      - DATABASE_URL=postgres://posthog:posthog@db:5432/posthog
      - REDIS_URL=redis://redis:6379/
    depends_on:
      - db
      - redis

  db:
    image: postgres:15
    environment:
      POSTGRES_PASSWORD: posthog
    volumes:
      - pgdata:/var/lib/postgresql/data

  redis:
    image: redis:7

volumes:
  pgdata:
# 서비스 시작
docker-compose up -d

# 로그 확인
docker-compose logs -f posthog
⚠️ 참고: 오픈소스 자체 배포 버전은 월 ≤ 10만 이벤트 처리량을 권장합니다. 이를 초과하면 PostHog Cloud로 이전을 권장합니다.
빠르게 시작: 첫 애플리케이션 연동
프론트엔드 JavaScript SDK 연동
SDK 설치:
npm install posthog-js
애플리케이션 진입점에서 초기화:
import posthog from 'posthog-js';

posthog.init('YOUR_POSTHOG_API_KEY', {
  api_host: 'https://us.posthog.com',  // 자체 호스팅은 http://your-server:8000으로 변경
  autocapture: true,  // 모든 클릭, 페이지 뷰 등 자동 캡처
});

// 커스텀 이벤트 수동 전송
posthog.capture('user_signed_up', {
  method: 'email',
  plan: 'free',
});

// 사용자 설정 (로그인 시 호출)
posthog.identify('user-unique-id-123', {
  email: 'developer@example.com',
  name: '홍길동',
});
autocapture: true는코드에 아무것도 심지 않아도모든 버튼 클릭, 링크 클릭, 폼 제출이 자동 기록된다는 의미입니다.
백엔드 Python SDK 연동
백엔드 이벤트(결제 성공, 주문 생성 등)용:
pip install posthog
from posthog import Posthog

# 초기화 (API 키는 환경변수 저장 권장)
posthog = Posthog(
    project_api_key='YOUR_PROJECT_API_KEY',
    host='https://us.posthog.com'
)

# 이벤트 캡처
posthog.capture(
    distinct_id='user-unique-id-123',
    event='payment_completed',
    properties={
        'amount': 99.00,
        'currency': 'USD',
        'payment_method': 'stripe',
    }
)

# 사용자 속성 설정
posthog.identify(
    distinct_id='user-unique-id-123',
    properties={
        'email': 'developer@example.com',
        'plan': 'pro',
        'company': 'TechCorp',
    }
)

# 클라이언트 종료 (앱 종료 시)
posthog.shutdown()
Next.js 풀스택 프로젝트 연동
npm install posthog-js posthog-node
// components/PostHogProvider.tsx
import { PostHogProvider as PHProvider } from 'posthog-js/react';
import { useEffect, useState } from 'react';
import posthog from 'posthog-js';

export function PostHogProvider({ children }: { children: React.ReactNode }) {
  const [clientReady, setClientReady] = useState(false);

  useEffect(() => {
    posthog.init(process.env.NEXT_PUBLIC_POSTHOG_KEY!, {
      api_host: process.env.NEXT_PUBLIC_POSTHOG_HOST || 'https://us.posthog.com',
      person_profiles: 'identified_only',
    });
    setClientReady(true);
  }, []);

  if (!clientReady) return null;
  return <PHProvider client={posthog}>{children}</PHProvider>;
}
// app/layout.tsx
import { PostHogProvider } from '@/components/PostHogProvider';

export default function RootLayout({ children }) {
  return (
    <html lang="zh">
      <body>
        <PostHogProvider>{children}</PostHogProvider>
      </body>
    </html>
  );
}
// app/page.tsx
'use client';
import { usePostHog } from 'posthog-js/react';

export default function HomePage() {
  const posthog = usePostHog();

  return (
    <button onClick={() => {
      posthog.capture('cta_clicked', {
        cta_text: '무료 체험 시작하기',
        page: 'homepage',
      });
    }}>
      무료 체험 시작하기
    </button>
  );
}
핵심 기능 실전
1. 프로덕트 분석: 사용자 행동 이해
데이터 연동 후, PostHog가 자동으로트렌드 차트, 퍼널 분석, 리텐션 곡선을 생성합니다.
퍼널 분석 예시: 가입 → 활성화 → 유료 전환
-- PostHog는 SQL 직접 쿼리 지원 (ClickHouse)
SELECT
    event,
    COUNT(DISTINCT distinct_id) as users
FROM events
WHERE event IN ('user_signed_up', 'feature_activated', 'payment_completed')
  AND timestamp > now() - INTERVAL 30 DAY
GROUP BY event
ORDER BY timestamp
PostHog UI에서:
1. Product Analytics → Funnels 진입
2. 단계 추가: user_signed_up → feature_activated → payment_completed
3. 단계별 전환율 확인
리텐션 분석:
1. Product Analytics → Retention 진입
2. 첫 번째 이벤트(예: user_signed_up)와 재방문 이벤트(예: pageview) 선택
3. D1/D7/D30 리텐션 곡선 확인
2. 세션 리플레이: 사용자의 실제 조작 확인
세션 리플레이로 사용자의 실제 조작 영상을 볼 수 있습니다 — 마우스 이동, 스크롤, 클릭 포함.
설정 방법:
posthog.init('YOUR_API_KEY', {
  api_host: 'https://us.posthog.com',
  session_recording: {
    maskAllInputs: false,  // 입력 내용 마스킹 안 함 (개인정보 민감한 상황은 true로)
    recordCrossOriginIframes: true,
  },
});
레이지 클릭(Rage Clicks) 문제 파악:
// 사용자가 동일 요소를 빠르게 5회 이상 연속 클릭하면 rage click 이벤트 트리거
posthog.onFeatureFlags(() => {
  posthog.capture('rageclick', {
    element: document.activeElement.tagName,
    page: window.location.pathname,
  });
});
PostHog 대시보드에서: 1. rage click이 포함된 모든 세션 필터링 2. 영상 직접 시청하여 사용자를 화나게 만든 UI 문제 파악 3. 원클릭으로 Issue 생성 후 개발 팀에 할당
3. 기능 플래그: 안전한 그레이 배포
기능 플래그로 코드 배포 없이 기능 온/오프를 제어할 수 있습니다:
// 특정 기능이 사용자에게 개방되었는지 확인
posthog.onFeatureFlags(() => {
  const newDashboard = posthog.getFeatureFlag('new-dashboard');

  if (newDashboard) {
    // 신규 대시보드 표시
    renderNewDashboard();
  } else {
    // 기존 버전 유지
    renderOldDashboard();
  }
});
실험적 배포 생성:
// 사용자 속성 기반 타겟팅
posthog.capture('feature_viewed', {
  $feature_flag: 'beta-search',
  $feature_flag_response: true,
});
PostHog 백엔드에서:
1. Feature Flags → Create Flag 진입
2. 이름 beta-search 설정
3. 배포 전략 선택:
- 전체 배포 (100% 사용자)
- 비율 배포 (예: 10% 사용자)
- 타겟 배포 (이메일 도메인, 사용자 그룹별)
4. 저장 후 SDK 자동 적용, 재배포 불필요
4. A/B 실험: 데이터 기반 결정
A/B 실험으로 통계학적으로 기능 변경 효과를 검증합니다.
// 실험 코드
posthog.onFeatureFlags(() => {
  const experiment = posthog.getFeatureFlag('landing-page-test');

  if (experiment === 'variant-a') {
    showVariantA();
  } else if (experiment === 'variant-b') {
    showVariantB();
  }

  // 실험 노출 기록
  posthog.capture('experiment_exposure', {
    $feature_flag: 'landing-page-test',
    variant: experiment,
  });
});
PostHog에서 실험 생성:
1. Experiments → Create Experiment 진입
2. 해당 기능 플래그 선택
3. 목표 지표 설정 (예: payment_completed 이벤트)
4. 유의 수준 설정 (일반적으로 95%)
5. 실험 실행 후 통계적 유의 결과 대기
PostHog가 자동으로 p 값, 신뢰 구간, 승리 확률을 계산합니다.
5. 오류 추적: 프론트엔드 예외 자동 캡처
import posthog from 'posthog-js';

posthog.init('YOUR_API_KEY', {
  api_host: 'https://us.posthog.com',
  capture_performance: true,
});

// uncaught errors 자동 캡처
window.addEventListener('error', (event) => {
  posthog.capture('frontend_error', {
    error_message: event.message,
    error_url: event.filename,
    error_line: event.lineno,
    error_col: event.colno,
    stack: event.error?.stack,
  });
});

// unhandled promise rejections 캡처
window.addEventListener('unhandledrejection', (event) => {
  posthog.capture('promise_rejection', {
    error_message: event.reason?.message || String(event.reason),
  });
});
PostHog Error Tracking 페이지에서: - 오류 빈도 트렌드 확인 - 영향을 받은 세션 영상과 연계 - 알림 규칙 설정 (예: 일일 오류 수 > 100 시 Slack 알림)
6. AI 옵저버빌리티: LLM 호출 추적
PostHog 2026년 특징 기능으로, AI 애플리케이션 개발자를 위해 설계되었습니다.
Python SDK로 OpenAI 호출 추적:
pip install posthog openai
from posthog import Posthog
import openai

posthog = Posthog('YOUR_API_KEY', host='https://us.posthog.com')

def generate_with_tracking(user_id: str, prompt: str):
    import time
    start = time.time()

    response = openai.ChatCompletion.create(
        model="gpt-4",
        messages=[{"role": "user", "content": prompt}]
    )

    latency = time.time() - start
    tokens_used = response.usage.total_tokens

    # LLM 호출 추적
    posthog.capture(
        distinct_id=user_id,
        event='llm_call_completed',
        properties={
            'model': 'gpt-4',
            'prompt_length': len(prompt),
            'response_length': len(response.choices[0].message.content),
            'tokens_used': tokens_used,
            'latency_ms': latency * 1000,
            'success': True,
        }
    )

    return response
LangChain으로 추적:
from langchain.callbacks import PostHogCallbackHandler

handler = PostHogCallbackHandler(
    api_key='YOUR_API_KEY',
    host='https://us.posthog.com',
    distinct_id='user-123',
)

# 체인에서 사용
chain = LLMChain(llm=llm, prompt=prompt, callbacks=[handler])
result = chain.run("안녕하세요, PostHog를 소개해 주세요")
PostHog 대시보드에서 확인할 수 있는 내용: - 각 LLM 호출의 지연 시간 분포 - Token 소모 및 비용 통계 - 실패 요청의 오류 원인 - 사용자별 호출 패턴
MCP 통합: 에디터에서 데이터 조회
PostHog는 MCP 프로토콜을 지원하여 Claude Code, Cursor 등에서 직접 프로덕트 데이터를 조회할 수 있습니다.
MCP 설정 (Claude Code):
// .mcp.json
{
  "mcpServers": {
    "posthog": {
      "command": "npx",
      "args": ["-y", "@posthog/mcp"],
      "env": {
        "POSTHOG_API_KEY": "phc_your_api_key",
        "POSTHOG_PERSONAL_API_KEY": "phx_your_personal_key",
        "POSTHOG_PROJECT_ID": "12345",
        "POSTHOG_API_HOST": "https://us.posthog.com"
      }
    }
  }
}
설정 완료 후 Claude Code에서 직접 대화:
> 지난 7일간 가입한 사용자가 몇 명인가요?
> /dashboard 페이지의 전환 퍼널을 보여주세요
> 어제 rage click이 가장 많았던 페이지는 어디인가요?
자주 묻는 질문
PostHog 무료 버전으로 충분한가요?
대부분의 인디 개발자와 중소 팀에게: 월 100만 이벤트 + 5,000회 녹화로 충분합니다. 일반적인 SaaS 사이트 기준, 100만 이벤트 ≈ 월 5-10만 MAU 수준입니다.
자체 호스팅과 Cloud의 차이점은?
| Cloud | 자체 호스팅 | |
|---|---|---|
| 운영 | 불필요 | Docker + DB 관리 필요 |
| 데이터 위치 | PostHog 서버 | 본인 서버 |
| 기능 완성도 | 전체 기능 | 일부 엔터프라이즈 기능 사용 불가 |
| 적용 규모 | 모든 규모 | 월 ≤ 10만 이벤트 |
| 가격 | 무료 한도 + 사용량 | 서버 비용 |
PostHog 성능 오버헤드가 큰가요?
JavaScript SDK는 비동기 로딩 방식으로 페이지 렌더링 성능에 영향을 주지 않습니다. 백엔드 SDK는 큐를 사용하여 배치 전송하므로 비즈니스 로직에 영향이 없습니다.
개인정보 보호 규정(GDPR/PIPL)을 지원하나요?
지원합니다. PostHog EU 인스턴스는 GDPR 요구사항을 충족합니다. 중국 시장은 maskAllInputs와 커스텀 데이터 필터링 규칙으로 PIPL에 대응할 수 있습니다.
정리
PostHog는 현재 가장 포괄적인 오픈소스 프로덕트 분석 플랫폼으로, Google Analytics + Hotjar + LaunchDarkly + Optimizely + Sentry 조합을 하나의 도구로 대체합니다. 개발자와 제품 팀에게데이터 자율 관리 + All-in-One 경험이 가장 큰 가치입니다.
핵심 리소스: - PostHog 공식 사이트 - GitHub 저장소 ⭐ 19,000+ - 문서 센터 - 배포 가이드 - 회사 핸드북 (오픈소스)
이 글이 도움이 되셨다면 더 많은 개발자분들과 공유해 주세요!