
本示例使用的OpenCV版本是:OpenCV 4.1.1
运行Python的编辑器:Jupyter notebook 6.0.0
示例目的
图像数据,一般以unit8和float32的格式保存,在有些时候,我们需要使用整数处理图像,有些时候我们需要用浮点数处理图像。
本教程,演示如何把图像的元素数据类型在unit8和float32之间转换。
实现代码
1,加载所需要的库
import cv2, numpy as np
import matplotlib.pyplot as plt
2,加载图像并显示原图信息
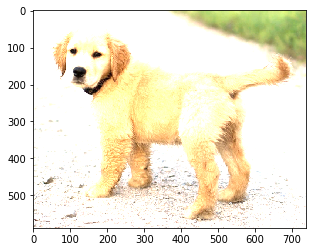
# 加载图像
img = cv2.imread('dog.png')
# 输出图像的矩阵形状,对应为图像的高度,宽度,色彩通道
print('Shape:', img.shape)
# 输出图像矩阵的元素数据类型
print('Data type:', img.dtype)

# 色彩空间转换,从BGR转为RGB
img = cv2.cvtColor(img, cv2.COLOR_BGR2RGB)
# 显示图像
plt.imshow(img)
运行完以上代码,会输出大小为588,738,3通道,元素数据类型为uint8的图像。
Shape: (588, 738, 3)
Data type: uint8

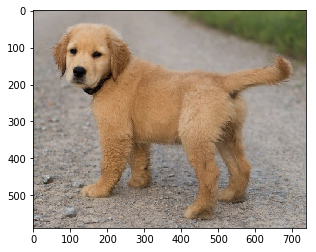
2,把元素数据类型 unit8 转换成 float32
[ndarray].astype可以把数据类型转换成指定的np数据类型。数据类型例如有:
- int
- np.int
- np.float64
- more...
具体,请参考 numpy.ndarray.astype https://docs.scipy.org/doc/numpy/reference/generated/numpy.ndarray.astype.html
# 把img的数据类型转换成float32 并除以255,元素的数据值则可以得到0-1范围的数值
img = img.astype(np.float32) / 255
# 输出图像的矩阵形状,对应为图像的高度,宽度,色彩通道
print('Shape:', img.shape)
# 输出图像矩阵的元素数据类型
print('Data type:', img.dtype)
plt.imshow(img)
运行完以上代码,会输出大小为588,738,3通道,元素数据类型为uint8的图像。
Shape: (588, 738, 3)
Data type: float32

通过观察两种元素数据类型的图像,发现并没有区别。但变成浮点数,方便了我们进行一些矩阵的运算。
3,每个元素的值都放大2倍,并剪切该值,使其保持在0-1之间
通过使用np.clip截取,超出的部分就把它强置为边界部分。
np.clip详细请参考 https://numpy.org/devdocs/reference/generated/numpy.clip.html?highlight=clip#numpy.clip
img_clip = np.clip(img*2,0,1)
plt.imshow(img_clip)
可以看到一张类似过曝的照片,如下:
4,把元素数据类型 float32 转换成 uint8
# 每个元素数据都乘于 255 ,并把数据类型转换乘unit8
img = (img * 255).astype(np.uint8)
print('Shape:', img.shape)
print('Data type:', img.dtype)
plt.imshow(img)
运行完以上代码,会输出大小为588,738,3通道,元素数据类型为uint8的图像。
Shape: (588, 738, 3)
Data type: uint8
程序说明
在本示例中,
- 使用了NumPy的astype对数据类型进行了转换。
- 使用了NumPy的np.clip来缩放元素的值。


